
Fabric Porch Bannerl!

Okay, so it’s 8:45 PM right now and I am in my kitchen writing this post. I had a tutorial made for this banner… And then I went to find it and edit it and well… it got deleted!! AH!! I am so frustrated right now!! I am so sorry that there won’t be pictures to go along with this tutorial. However, it is super easy so I hope I can explain it okay without pictures!
1. Cut your fabric into 8×8 squares. I am definitely not a sewer, so my squares were totally not even ha. But it still works perfect! I used 2 fabrics, but 1 or more would be darling as well!
2. Fold your squares in half and from the bottom corner, cut to just below the middle of the folded portion. I hope this makes sense! It will make the little triangle looking part at the bottom of each piece of fabric.
3. Punch holes into both of the top corners of the fabric and string twine or ribbon through them.
4. I put tape on the back of each piece of fabric so the squares wouldn’t slide. I just taped the string to the fabric.
5. Tie ribbons in between each piece of fabric. I am going to switch out my ribbon for each season/holiday so the banner can stay up for awhile!
6. Hang it on your porch, mantel, wherever you would like!
7. ENJOY!!
I hope that was easy enough and makes sense! If you have any questions comment below or shoot me an email! Again I apologize for no pictures!! It just lets you use your imagination a little more. If I didn’t work tomorrow morning at 5AM I would totally redo the tutorial tonight! I guess that shows me not to procrastinate!!
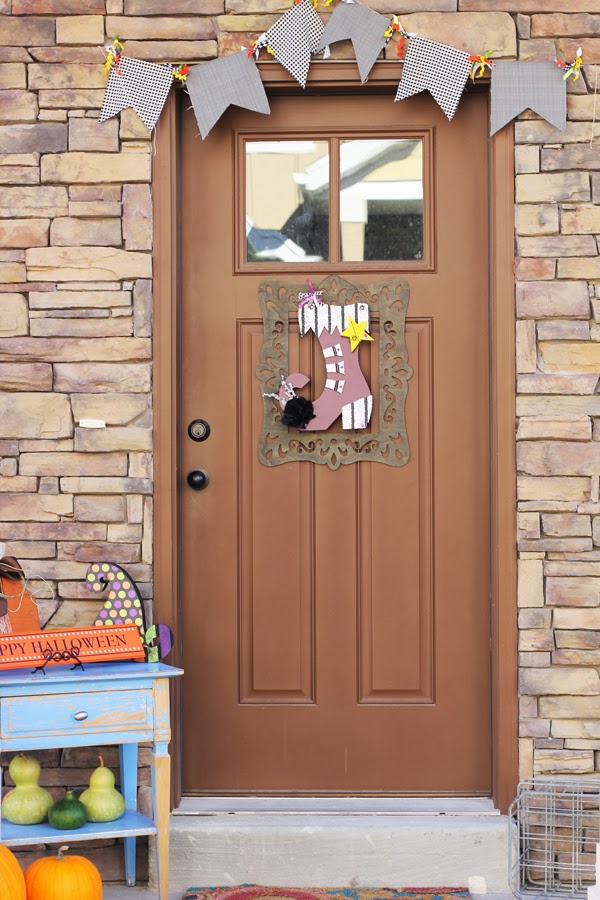
Here is how it hangs on my porch. Stay tuned tomorrow for the last Halloween post before we go back to outfit posts (which I have to admit I totally miss!!)

Looks great! Such a good idea!
The Style Storm
xo, Christina
Loooovely, If I walked by your house, I’d totally stop and Instagram it! lol
Cee. ♥
Code Overdressed